DIY Herb Garden Markers that add character to your garden. These creative Plant Stakes are so easy to make using air-dry clay and letter stamps.

Last year I made these cute DIY plant stakes for my shop. The customers loved them and they were so easy to make. I decided to remake them this year and utilize them to label my herb garden.

Come see how fun and easy these are to make. I think they would make a great gift as well!
DIY Herb Garden Markers

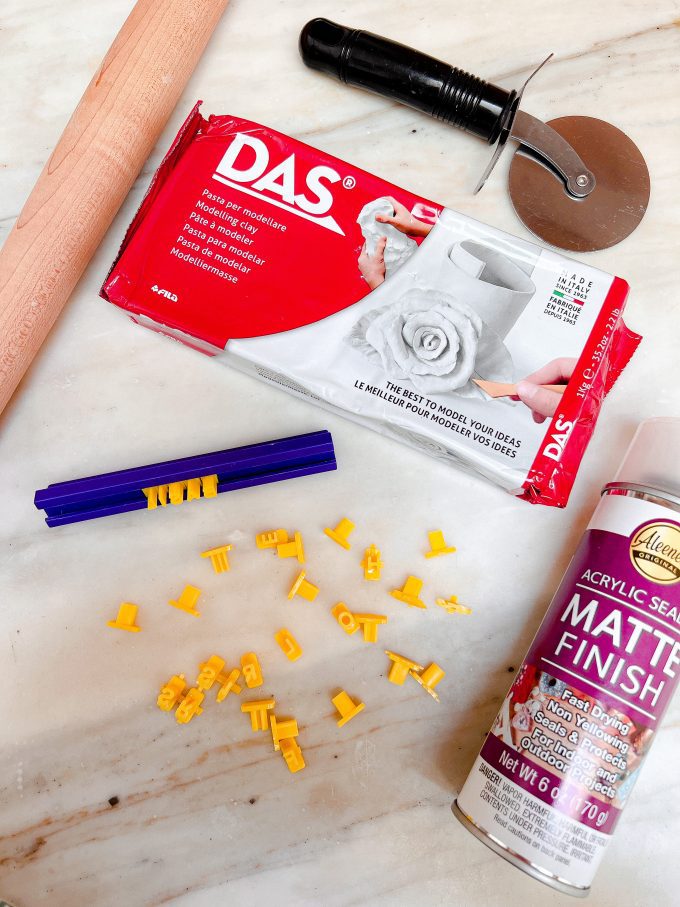
Let’s make some fun and cute herb garden plant stakes! All you need is air dry clay, a pizza cutter (or knife), letter stamps and acrylic sealer. This is a great project for summer afternoon and the kids will love making these too!
How To Make DIY Embossed Garden Markers

Supplies Needed For This Project:
- Air Dry Clay (I used white)
- Letter Stamps
- Pizza Cutter or knife
- Acrylic Sealer
- Baking Sheet
Step 1: Roll Out Your Clay
After you have gathered together all your supplies, roll out your air dry clay into an even disk about 1/2″ thick. Make sure it is smooth and even.
Step 2: Cut Your DIY Garden Markers

Using a pizza cutter, cut even strips of clay that are at least 8″ long and 3/4″ wide. Evenly cut the top straight across. For the bottom, cut the dough to form a point. This makes it easier to place in the dirt.
Step 3: Shape and Stamp The Plant Stakes

Now, roll the top edge of the clay down so it creates a cute spiral. This is totally optional but I think it adds a lot of character.
Now, it’s time to stamp your DIY herb garden markers. Determine what each plant stake will say and gently push the letters into the clay to spell each word. If the dough spreads out on the sides while you are stamping, don’t worry. After, you can even out the edges before baking them.
Step 4: Bake To Speed Up The Drying

Place each stake onto a baking sheet fitted with a cooling rack and bake in the oven at 200 degrees for 45 minutes to an hour. You will have to keep checking the diy garden markers to see when they are done. You can tell when all the moisture has been removed from the clay. Remove from the oven and let cool overnight.

Once the garden markers are cooled and dry, spray with acrylic sealer. This will make the clay resistant to any moisture in the soil.

Place your DIY Herb Garden Markers in your plant and enjoy!
10 Summer Gardening Ideas
And be sure to check out these beautiful ideas being shared today by my friends. So many creative patio design and gardening tips! Click the links to visit their posts.

How To Hang Patio Lights // Happy Happy Nester
How To Pull The Yard Together // Finding Lovely
Backyard Deck Decor // Craftberry Bush
How To Make A Stock Tank Garden // Most Lovely Things

How To Arrange Garden Containers // My Sweet Savannah
Clay Herb Garden Markers // Modern Glam
Amazing DIY Strawberry Planter // Twelve On Main

How To Grow The Best Tomato Plants Ever // My 100 Year Old Home
How To Plant Moss Basket Container Garden // Inspiration For Moms
Cheap Simple Front Yard Landscaping Ideas // The Happy Housie
Air Dry Clay Project Ideas
I love working with air dry clay. Here are some other project ideas that I have shared in the past. Click the image to view each post and get the instructions.


Save This Pin For Later

- DIY Painted Robins Eggs for Easter Decor - March 15, 2025
- Chocolate Bunny Cupcakes for Easter - March 12, 2025
- Easy Cinnamon Roll Bunnies With Orange Glaze - March 5, 2025


Annie Diamond
So cute, Ashley! I love how they look with the Uashmama bags too! xx
Jackie Hempel
These are sweet little markers Ashley! I love that you can customize them to anything!
Melaine Thompson
I love these! Did I miss a link for the letter stamps? I would love to make these too! I already have the clay!
ashley
Thanks for the reminder! I added links under the materials list.
Laura
The cutest herb garden markers I ever did see! Love em!
Juliet
These are the cutest! You’re so clever. Love.
Janine
Ashley,
I love this DIY! You always have such cool diys!